How to screen record on a Mac with audio
Press Shift-Command-5, choose what to record, open Options and pick a microphone. That records your voice. Whether you can also record the sound your apps are playing depends on your macOS version:
- macOS 27 Golden Gate or later: yes. In Options, choose Include System Audio.
- macOS 26 Tahoe or earlier, and every Intel Mac: no. The built-in tools only record a microphone, so you need a recording app that captures system audio, or a virtual audio device.
Most guides still say Macs can't record internal audio at all. That was true until macOS 27 shipped on September 14, 2026, and it's still true for older versions and for Intel Macs, which can't install 27. Check your version under Apple menu > About This Mac, then use the matching method below.
Method 1: the Screenshot toolbar (every Mac)
- Press Shift-Command-5 to open the Screenshot toolbar.
- Choose Record Entire Screen, Record Selected Window or Record Selected Portion.
- Click Options and choose a microphone to record your voice. On macOS 27 or later, also choose Include System Audio to record app and browser sound.
- Click Record.
- To stop, click the Stop button in the menu bar or press Command-Control-Escape. The recording saves to your Desktop by default.
Steps from Apple's support article How to record the screen on your Mac.
Method 2: QuickTime Player (microphone only)
Open QuickTime Player and choose File > New Screen Recording (Control-Command-N). Click the arrow next to the Record button to choose a microphone, then click Record and click anywhere to record the full screen, or drag to select an area. Stop from the menu bar or with Command-Control-Escape. QuickTime has no system audio option, so on any version it records your voice but not the sound from your apps.
Method 3: a recording app (system audio on older Macs, plus camera)
If you're on macOS 26 or earlier, on an Intel Mac, or you want your camera in the video too, use an app that records system audio itself. We build PandaStudio, so here's how it works there. It runs on macOS and Windows, records system audio on macOS 13 Ventura or later (Intel or Apple silicon), and is free to try.
- Open PandaStudio and choose what to record: Camera, Screen, or Both.
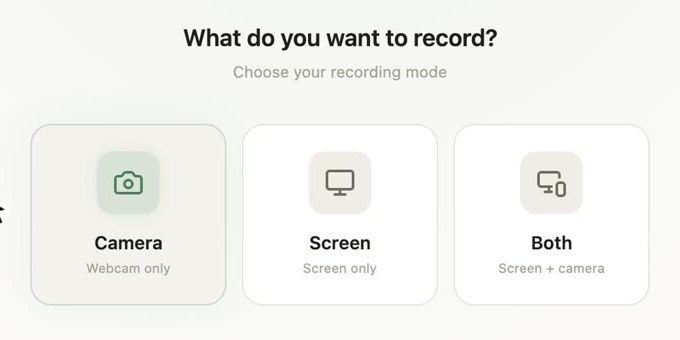
- On the recording bar, pick the screen or window, then turn on the system audio button (the speaker icon) and the microphone. The camera button adds your face as a bubble you can move later.

- The first time, macOS asks for Screen Recording and Microphone permission. Allow both in System Settings > Privacy & Security, then reopen PandaStudio.
- Click record. When you stop, the recording opens as a project, already transcribed, so you can cut mistakes by deleting words, remove "um"s and silences in one click, add captions, and export.
If you'd rather not record your own voice, you can add a voiceover afterwards with the built-in narration voice, or have an AI agent record and narrate the whole walkthrough for you (see AI agent screen recording).
Method 4: a virtual audio device (free, more setup)
On older macOS versions you can route system sound into the built-in recorder with a free virtual audio driver such as BlackHole. Install it, open Audio MIDI Setup, create a Multi-Output Device that includes your speakers or headphones and BlackHole, and set it as your sound output. Then choose BlackHole as the microphone in the Screenshot toolbar's Options. The catch: that records system sound instead of your voice. To get both you need an Aggregate Device as well, and you should switch your output back when you're done.
Troubleshooting
- No sound at all: no microphone was selected in Options, or the recording app lacks Microphone permission.
- Voice but no app sound: expected on macOS 26 and earlier with the built-in tools. Use Method 3 or 4, or update to macOS 27 on an Apple silicon Mac.
- Black screen or only the wallpaper: Screen Recording permission is missing for that app. Grant it in Privacy & Security and restart the app.
Questions
Can a Mac record internal audio while screen recording?
Yes on macOS 27 Golden Gate or later: in the Screenshot toolbar (Shift-Command-5), open Options and choose Include System Audio. On macOS 26 Tahoe and earlier, and on Intel Macs, the built-in tools only record a microphone, so you need an app that captures system audio, such as PandaStudio (macOS 13 or later), or a virtual audio device like BlackHole.
Why is my Mac screen recording silent?
Usually because no microphone was chosen in Options, because system audio isn't supported on your macOS version, or because the app doing the recording doesn't have Microphone or Screen Recording permission in System Settings > Privacy & Security. Check those three first.
Does QuickTime record system audio?
No. QuickTime Player's screen recording lets you pick a microphone, but Apple's instructions don't offer a system audio option. Use the Screenshot toolbar on macOS 27 or later, or a recording app.
Where do Mac screen recordings save?
Recordings from the Screenshot toolbar go to your Desktop by default; you can change the location in Options. QuickTime opens the recording when you stop so you can save it. PandaStudio saves each recording as a project you can edit straight away.
Can I record my screen, my voice and my camera at the same time?
The built-in tools record the screen and one audio source, with no camera overlay. PandaStudio records screen, camera, microphone and system audio together, then lets you move and resize the camera bubble afterwards.