Browse all docs
Animate a video, overlay or text with keyframes
PandaStudio animates position, scale, rotation and opacity over time with keyframes on the main video, image and video overlays, motion graphics, text, the camera bubble and the captions, with a curve between each pair of keyframes.
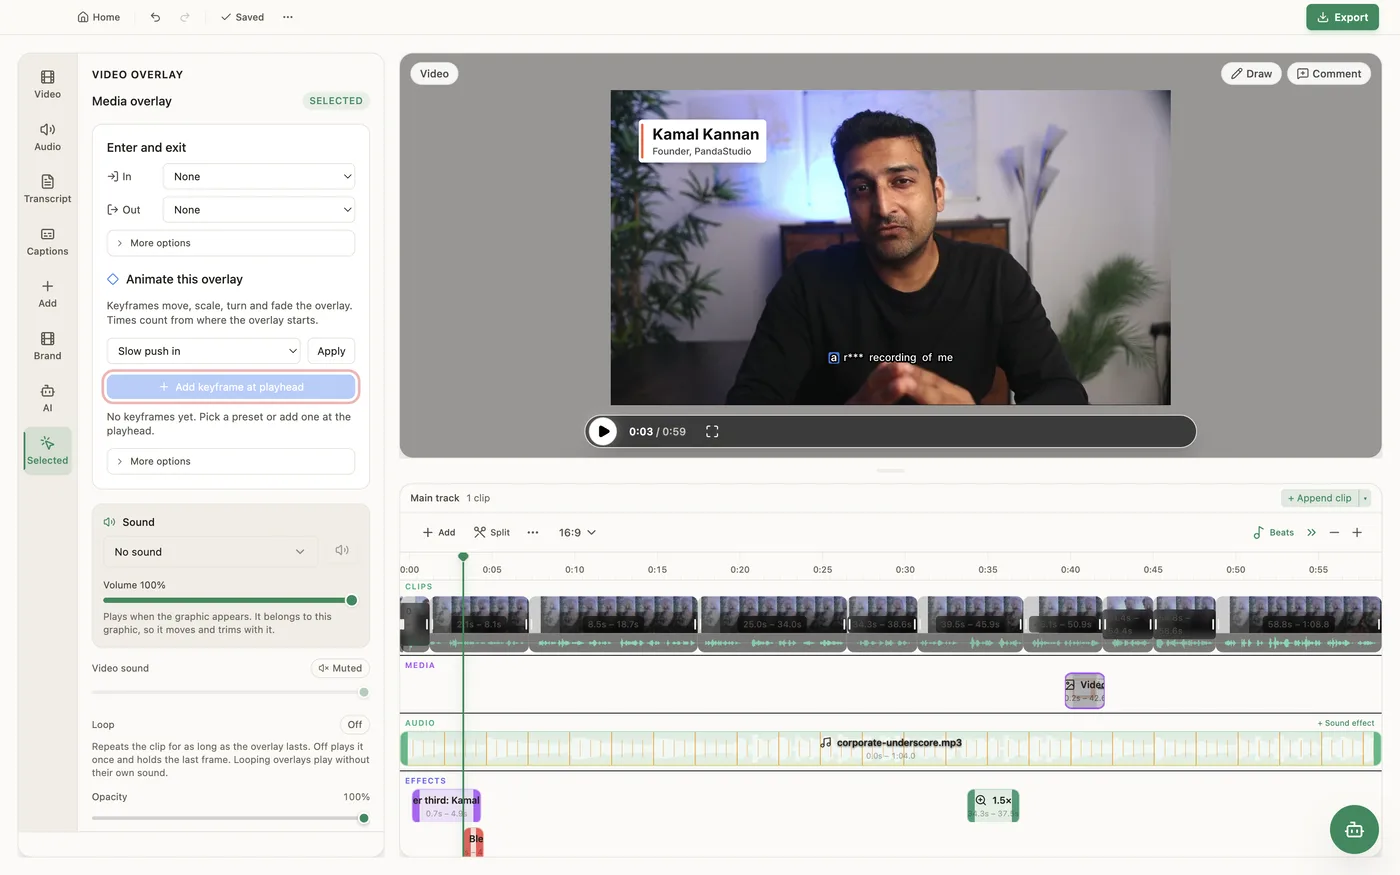
Select an overlay, a graphic or a text annotation and its panel shows Animate this overlay (or Animate this annotation). Move the playhead inside the item and click Add keyframe at playhead, or press F, to store its current Move X, Move Y, Scale, Rotate and Opacity at that moment; set different values at a later moment and PandaStudio moves between them. Keyframe times count from the start of the item, so moving or retiming the item keeps the animation with it. Each keyframe has a curve to the next one: Smooth (the default), Slow start, Slow finish, Steady, Jump (no glide), Overshoot, Elastic, Smooth S-curve, Fast then soft, Gentle pan or a Custom curve. Preset move fills in the keyframes for you: Slow push in, Slow pull out, Slide in from left, right, below or above, Fade in, Fade out, Spin in, Pop in and Shake. To animate the main video itself, open Add on the timeline, then More options… and choose Animate the video (keyframes); the same menu has Zoom camera move, Move the camera bubble, Animate the frame style and Move captions, each as its own keyframe track. A zoom can be turned into camera keyframes with Edit as keyframes, which keeps the picture the same and lets you change it one keyframe at a time. Animated items show their keyframes on the timeline, and you can drag a keyframed video in the preview to update the keyframe at the playhead. Enter and exit transitions (fade, pop, slide) are separate and play on top of the keyframed move. The preview and the export draw the same frames, and everything renders on your computer.
In the app
- 1Click the overlay, graphic or text on the timeline. Its panel on the right shows Animate this overlay (or Animate this annotation).
- 2Move the playhead to where the move should start and click Add keyframe at playhead (or press F).
- 3Move the playhead later, change Move X, Move Y, Scale, Rotate or Opacity, and add another keyframe. Pick a curve for each keyframe under Keyframes and more.
- 4Or pick a Preset move such as Slide in from left or Pop in and click Apply to replace the keyframes with it.
- 5To animate the main video, click Add on the timeline toolbar, open More options… and choose Animate the video (keyframes).
- 6To fine-tune a zoom, select it and click Edit as keyframes.
Ask the AI
Open the AI chat in the editor and say any of these. The agent does the edits for you.
CLI & MCP
Every capability is a verb, reachable from the terminal or from an MCP agent (Claude Code, Cursor, Cline, Continue, Claude Desktop).
pandastudio project.add-keyframe --id=$ID --target=overlay --regionId=$OVERLAY --timeMs=0 --x=-0.4 --opacity=0 --easing=ease-out
timeMs counts from the item's start. x and y are fractions of the frame (0.1 = 10%), scale is a multiplier, rotation is degrees clockwise, opacity 0 to 1. A keyframe at the same time is merged. Targets: main, overlay, annotation, adjustment.
pandastudio project.set-keyframes --id=$ID --target=overlay --regionId=$OVERLAY --keyframes='[{"timeMs":0,"scale":0.8,"opacity":0},{"timeMs":600,"scale":1,"opacity":1,"easing":"back"}]'Replaces the whole track. Pass [] to clear an overlay's or annotation's animation.
pandastudio project.remove-keyframe --id=$ID --target=overlay --regionId=$OVERLAY --keyframeId=$KEYFRAME
pandastudio project.add-motion --id=$ID --atMs=5000 --durationMs=3000 --preset=push-in
A keyframe track on the main video (target screen, the default), the zoom camera, the camera bubble, the frame style or the captions. Edit it afterwards with add-keyframe --target=main.
pandastudio project.convert-to-keyframes --id=$ID --regionId=$ZOOM
Bakes zooms (manual, auto and cursor-follow) in the span into camera keyframes that render the same frames. Or pass startMs and endMs in edited ms.